Menu
 1.866.668.5111
  6:30 am - 6:00 pm
 Give a Happy High Five!

« Back to News
June 12, 2013
ERS Moment: Child Related Displays
“Moving from good to great is not a difference of miles, it’s millimeters.” – Anonymous 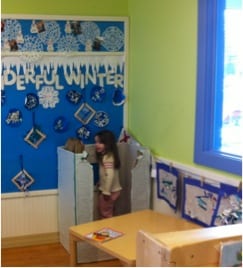
Life-long learning is an essential part of being an educator, so from week to week we will be sharing tips and tricks related to ECERS and ITERS content on a variety of topics.
As simple as it may seem, displays for children have a heavy impact in the classroom. When you step back and look at your room, ask yourself, “Does what I have displayed and how I have displayed it, have an impact on my children?” The following are some key points to keep in mind, which are qualities the Environmental Rating Scale (ERS: ITERS and ECERS) asks of early childhood programs:
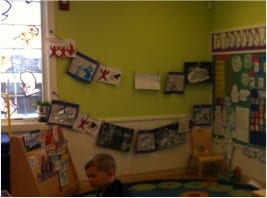
- Displays contain many pictures, pieces of artwork, photos, etc. It must impact you when you take a step back and look. Are display boards filled adequately and meaningfully? Take a walk through your own center and look at what others have done for inspiration!
- Talking about displays with children is important. Take time to make connections between the displays in your classroom and what you are doing or talking about with the children. You put so much energy into putting them up, so use them!
- Displays should be at children’s eye level. Obviously not everything can be at children’s eye level, but low boards need to be utilized and bottom halves of boards should not be empty. The items which you and your children use the most should be placed accordingly for their visual level.
Age Specifics
- Mobiles are used as a means of display and to make materials more interactive. A large group mural hanging on the wall does not count. *Per OCFS, nothing can be hung from the ceiling.
For Infants & Toddlers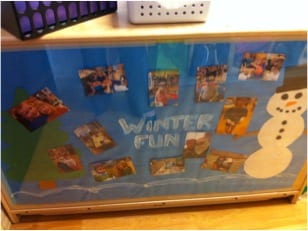
- MOBILES – for infants this should be done high enough if used for artwork, so children cannot touch it. Using a “clothesline” concept (a window suction cup attached to one window and the other side of the string stapled to a bulletin board with art hung from it) is a great way to add mobiles to a classroom. Infant mobiles hanging on play mats also count for this indicator. For toddlers, making a clothesline over the dramatic play center with either child-made or themed related materials are an easy way to achieve this as well.
- PICTURE PROTECTION – pictures that are accessible for children, especially those which can become a hazard, should be protected with plastic covers or contact paper. In infant rooms, pictures displayed at a child’s level should be secured with contact paper or another barrier. For toddlers, ensure displays, which become an issue with tearing or pose any other problems, are also protected.
- PHOTO DISPLAYS – photos of both children and their families need to be at their eye level. An easy way to make this interactive is to contact paper to pictures and double stick Velcro to the back of the photo, as well as on a spot on your board. Then, children can take their picture and hold it when they like without damaging it or having a display torn down.
 For Preschool & Pre-K
- MOBILES – you can do the same as toddlers, as well as make additional hanging displays throughout the room. This is a great way to expand a letter display. Children can make pictures related to differing letters, which can be used for review while on display in the classroom.
- CHILD MADE DISPLAY – simply take a step back to assess pre-made or teacher-made materials and see if they outweigh the display of children’s work. This can easily be done and fixed!
- INDIVIDUALIZED CHILDREN’S WORK – when looking at your displays, does every/most piece of children’s artwork look the same? “Individualized” is a twofold meaning in this indicator. When assessing this, ask yourself, “Are the children’s projects process oriented, rather than product oriented? Do they look different in their own way?” And, “Are any easel or independent artwork displayed as well?” If you answer yes, be more mindful when setting up art experiences and allow children to take charge.
- 3-DIMENSIONAL WORK – find ways to incorporate 3D works which children create. An easy way to do this is to provide children with materials and let them freely create. Clay sculptures or paper mache are great ways to achieve this as well. Gluing things on a flat surface is not considered “3D.”